Introduction:
Welcome to our blog, where we’re going to get you up and running with your free website. By the time you’re through reading this post, you will have a live website that anybody can access online. Not only are we going to show you how to make a website for free; we’re also going to include how to easily design a website with drag-and-drop ease. Please read on further till the last word on how to learn everything.
Get Your Website Online:

Now, the portion that falls in to making a website is the launching part. You may accomplish it by taking the next three steps:
Step 1: Create an Account in Profreehost:
One has to hit profreehost.com and then register now for account creation. Fill the details now, hit the registration button, and your account will be created successfully.
Step 2: Get Your Free Domain:
A domain is, for example, techssm.com. You can create a free domain by clicking “create new” and then adding what you would want your website to be called, and you will get a domain address which people can use when reaching your website.
Step 3: Installing WordPress on Your Domain:
This is a platform you can easily create websites with no coding or programming.
To install WordPress: Log in to your account, scroll down and under software select “apps installer”. You install WordPress by creating a username and password for your website. Your website will now be operational on the internet.
Building Your Website:

Now that your website is launched, it’s time to build it. Do so in the following three steps.
Step 1: Logging into Your Website:
Just put “/wp-admin” after the address of your site to log in, using the same login information you created earlier for your WordPress site. You should now see the WordPress dashboard where you’ll control and manage your website.
Step 2: Selecting Your Website’s Design:
You do not build the website right from scratch. You just pick up a design and then make that yours. First, install the “Astra” theme in WordPress. It will have a great variety of designs of the websites. Pick the one you want to use and import that into your site using Elementor.
Step 3: Modifying Your Website’s Content:
To edit any of your site pages, visit that page then click “Edit with Elementor.” Now you can change the text, images, or other items on your website by simply clicking on the text, images, or other items to change as you would like, then click “Update” when complete to save your changes.
Creating New Pages and Customizing Your Website:
Want to add a new page on your site?
Just click “New,” then “Page”. Provide a title for the page and build with Elementor. Drag and drop functionality, clicking on available elements, or even their ready page templates to build out your page.
The very top section of your site can be customized in the WordPress “Customize” section. That is where you can change the logo and the menu portion of your header.
Getting a .com Domain:
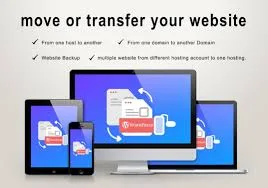
For a professional domain name, go to Godaddy.com to purchase a .com domain. For the most part, you really only need to fill in the name that you would want for your website in their website search bar and finish the purchase. All you have to do is log in and transfer your website onto your .com domain.
Transferring Your Website to Your .com Domain:

Below are the steps that would help you in transferring your website to your .com domain.
Step 1: Adding Your Domain on ProFreeHost:
Step one is logging into your account at ProFreeHost. Scroll down to Domains, and from the dropdown items, click Parked Domain. A box will appear to which you can add your new domain name. This is so that ProFreeHost links up with your domain.
Step 2: Add Your Domain Details on GoDaddy:
Log in to your GoDaddy account and under “DNS,” add the details given by ProFreeHost. This step will assist in integration and joining the domain with GoDaddy and ProFreeHost for the smooth running of everything.
Step 3: Add Your Domain to WordPress:
Now log back into your WordPress dashboard. All the way to the left of the screen, click “Settings”, then “General”. Fill in that temporary domain of yours with a new .com so that it will be your correct website when people come to visit. Save only and you’re all ready and shining online!
Conclusion:
You have just got yourself a free website now.
Now everybody can view your site with the domain address you acquired. Do not stop yet! You will further be granted the opportunity to personalize this website by putting your content on it. This might make it fun and exciting for visitors viewing the website.


Your dedication to community service is making a real impact. Your contributions to local initiatives inspire us all to be more involved in our communities.
This is so relatable! Your honesty is refreshing. Thanks for sharing your experiences—it makes us all feel a little less alone.
Your DIY project is genius! The way you turned something simple into a work of art is truly impressive. Your creativity knows no bounds.